News & Events
What You Need to Know About Zippers Before You Sew
No Comments
Most sewists avoid zippers longer than they should. They stick with pullovers and elastic waistbands because zippers feel unpredictable. But the garments you actually want to make, the fitted dress, the tailored jacket, the trouser with a clean front, all of them need a zipper done right.
Once you understand which zipper to choose and why, installation stops being a guessing game. This guide covers zipper length, weight, type, and the specific situations that come up when you are sewing fitted garments.
How Zipper Length is Measured
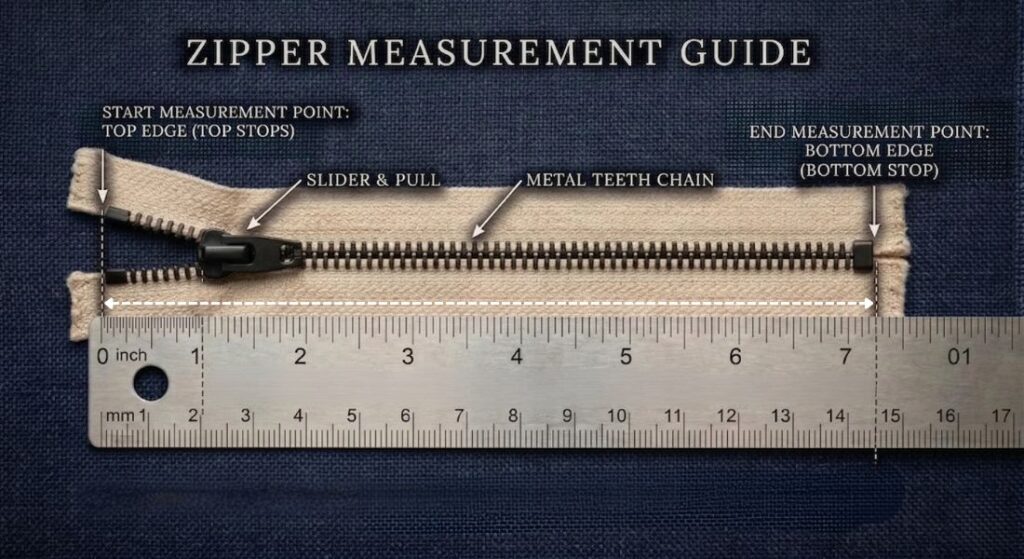
When a pattern calls for a 22-inch zipper, that number refers to the functional length, from the top stop to the bottom stop. The extra tape above and below those stops does not count. Measure stop to stop, not end to end, or you will pull a zipper from your stash thinking it fits and discover at the machine that it does not.
If you need a length longer than what your fabric store carries, most top out at 22 or 24 inches, you have two options. Buy zipper tape by the yard and add your own stops and slider, or adjust your pattern to work with a shorter zipper using an extended facing or waistband. The second option is usually the easier one.
What Zipper Size Numbers Mean
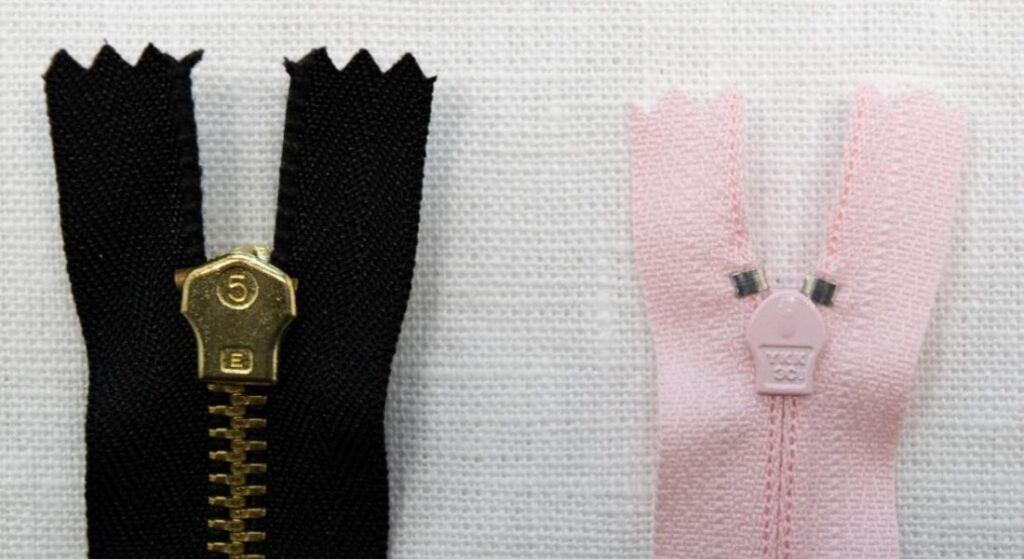
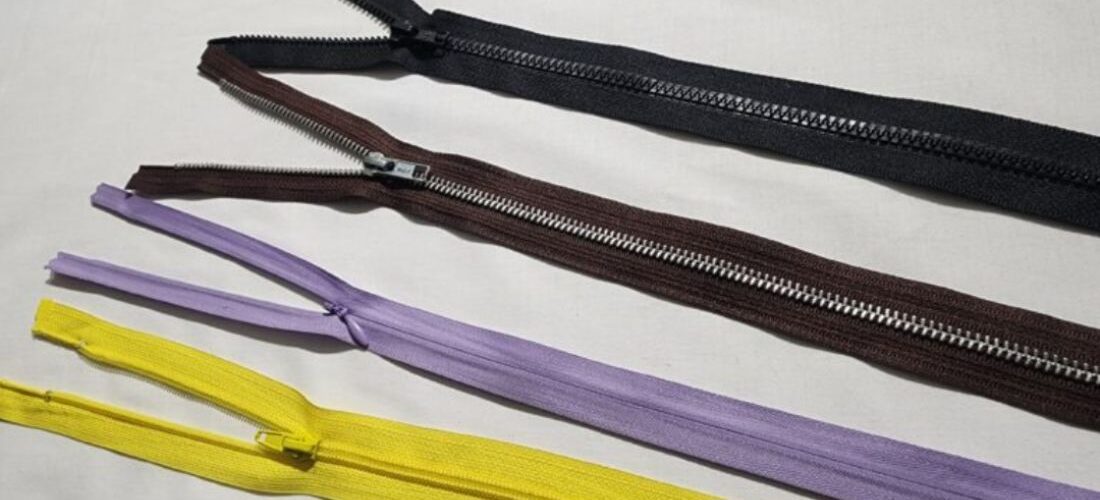
Zippers are labeled with numbers like #3, #5, and #7. That number tells you the width of the teeth when the zipper is closed, measured in millimeters. A #3 zipper has teeth that are 3mm wide. A #5 zipper has teeth that are 5mm wide.
Size affects both the visual weight and the strength of the zipper. Smaller sizes like #3 work well with lightweight fabrics like silk or cotton lawn. Larger sizes like #5 or #7 are better for medium to heavy fabrics like linen, wool suiting, or denim.
If you need to replace a broken zipper in an existing garment, check the back of the slider. The size number is usually stamped there. Match that number when you buy the replacement.
The Four Main Types of Zippers
There are four zipper types and each one works best in specific situations. Knowing the difference means you choose the right one before you start sewing instead of troubleshooting after.
Coil Zippers

Coil zippers have thin flexible teeth made from a continuous spiral of nylon or polyester. They bend and curve easily which makes them the most versatile zipper type you can stock in your studio.
Best used for: fitted dresses, curved seams, fitted bodices, skirts and any garment with a center back or side closure that follows the curve of the body.
Best fabrics: lightweight to medium weight fabrics including cotton lawn, silk charmeuse, crepe, ponte and jersey. The flexibility of the coil works with fabrics that move rather than against them.
Pretreatment: Coil zippers can shrink slightly the first time they are washed. If your garment will be laundered, preshrink the zipper by soaking it in warm water for about 15 minutes then laying it flat to dry completely before you install it. This takes two minutes of effort and saves you a puckered seam later.
Best installation method: centered/slot installation or invisible installation. Also works well in a lapped application on lighter fabrics.
Molded Plastic Zippers
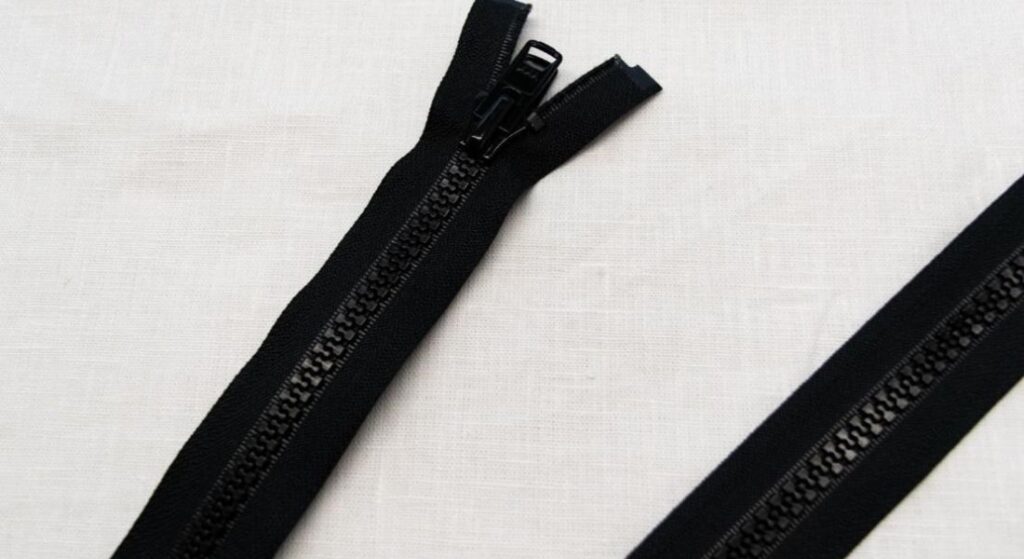
Molded plastic zippers have individual teeth that interlock like puzzle pieces. They are strong and durable but they do not flex. That rigidity is the whole point when you need a zipper that holds up under stress.
Best used for: outerwear like coats and jackets, bags, sportswear and any garment where the closure takes repeated heavy use. Use them in straight seams only. If you force one into a curved seam the finished result will pucker and fight you the entire time.
Best fabrics: medium to heavy fabrics including wool coating, canvas, denim, corduroy and heavy linen. These fabrics have enough body to support the weight and stiffness of the zipper.
Pretreatment: Plastic zippers do not shrink but the tape can. Preshrink the tape the same way you preshrink your fabric. A quick soak in warm water and a flat dry is all it takes. Also run the slider up and down a few times before installing. If it drags rub a little beeswax or a white candle along the teeth. It slides smoothly after that.
Best installation method: lapped installation or centered/slot. Never use in an invisible installation. The rigid teeth cannot curl under the tape the way a coil zipper does.
Metal Zippers
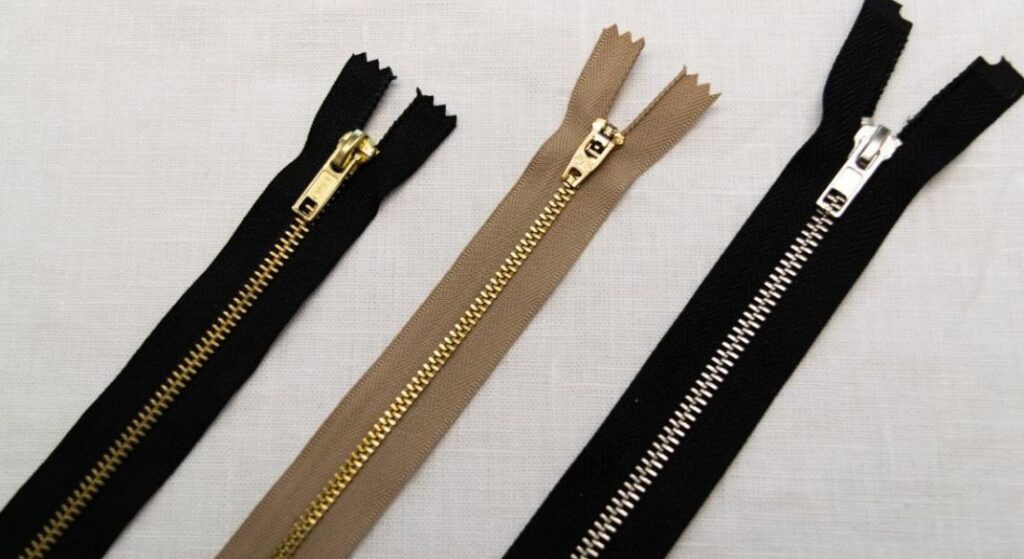
Metal zippers have teeth and a slider made from brass, nickel or other metals. They are strong and they look substantial. That visible hardware is part of the design not something to hide.
Best used for: jeans, structured trousers, tailored jackets, blazers and any garment where the zipper is meant to be seen and appreciated as a design detail. They work beautifully on a well tailored pair of pants where the zipper hardware complements the overall polish of the garment.
Best fabrics: medium to heavy fabrics including denim, wool suiting, tweed, heavy cotton and leather. These fabrics have the structure to support the weight of the metal hardware. Avoid pairing metal zippers with delicate or lightweight fabrics. The weight will drag on the fabric and distort the seam over time.
Pretreatment: Do not soak metal zippers. Water encourages rust and corrosion especially on brass teeth. Instead preshrink the tape only by pressing it lightly with a steam iron on a low setting. Keep the iron off the teeth. Before installing run a little beeswax along the teeth if the slider feels stiff. Never use oil or petroleum based lubricants on metal zippers as they will stain your fabric.
Best installation method: lapped installation or fly front installation on trousers and jeans. The visible hardware makes a lapped installation look intentional and polished.
Invisible Zippers
Invisible zippers have coil teeth that curl under the tape so they disappear completely into the seam. When installed correctly you see only a clean line of stitching from the outside. No visible hardware, no topstitching, nothing to interrupt the line of the garment.
Best used for: center back closures on dresses and skirts, side seam closures on fitted tops and anywhere you want the garment to look like it has no closure at all. For a tailored fitted dress this is almost always the right choice.
Best fabrics: light to medium weight fabrics including crepe, silk, wool challis, ponte and cotton sateen. Invisible zippers work best when the fabric drapes rather than stands away from the body. Avoid very heavy fabrics as the zipper tape is not built to handle significant stress at the closure point.
Pretreatment: Preshrink invisible zippers the same way you preshrink coil zippers. Soak in warm water for 15 minutes and dry flat. There is one additional step that most sewists skip and then wonder why their invisible zipper installation looks wavy. Before you install the zipper press the coil open gently with a cool iron. The teeth naturally curl under but pressing them open slightly makes them much easier to stitch close to the coil. Use a low heat setting and press lightly. You are just opening the curl slightly not flattening the zipper completely. This one step makes a visible difference in the finished result.
You will also need an invisible zipper foot for this zipper type. A regular zipper foot will not get close enough to the coil and the teeth will show after installation.
Best installation method: invisible installation only. This zipper is designed for one purpose and it does that one thing beautifully. It is not interchangeable with other installation methods.
Of all four zipper types this is the one I reach for most. Once you have the right foot and understand how to press the coil open before installing, the process is straightforward and the result is clean every single time.
Separating Versus Non-Separating Zippers
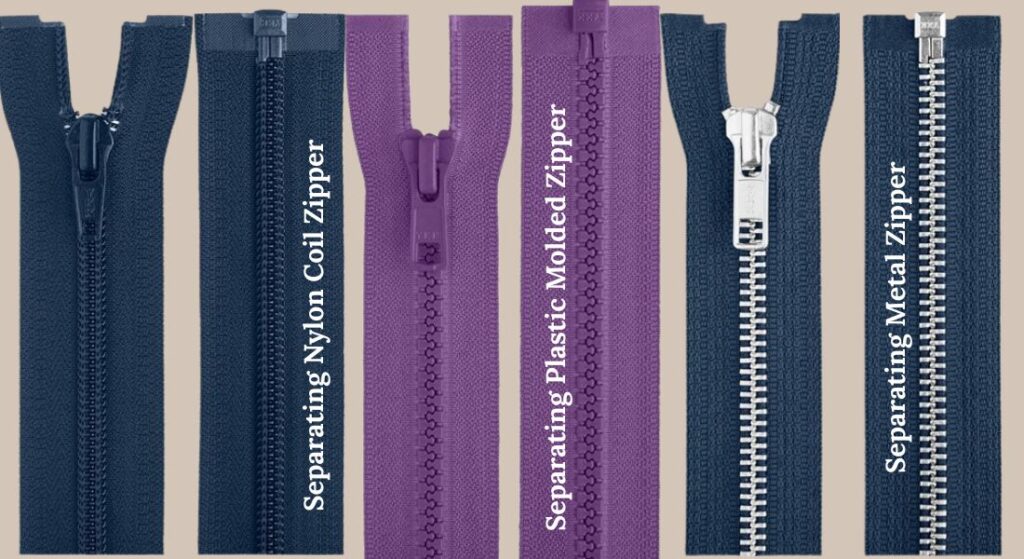
Before you buy a zipper check whether it separates completely at the bottom or stays joined. A separating zipper splits into two halves at the bottom stop. This is what you need for jacket and coat fronts where the garment opens completely. A non-separating zipper stays joined at the bottom and is used for dresses, skirts, pants and anywhere the closure does not need to come fully apart. Buying the wrong one means a trip back to the store so check this before you leave.
Coil, molded plastic and metal zippers are all available in both separating and non-separating versions. Invisible zippers are non-separating only. The way the coil is constructed makes a separating version impossible so do not go looking for one. If you need a separating closure on a garment that calls for an invisible finish a lapped coil zipper is your best alternative.
Matching Zipper Tape to Your Fabric
The zipper tape is the fabric strip on either side of the teeth. It sits inside your seam allowance but on lightweight or sheer fabrics it can shadow through to the outside. Choose a tape color that matches your fabric as closely as possible. On very lightweight fabrics like silk or cotton lawn press the seam allowances away from the tape after installation to reduce shadowing.
Building a Zipper Stash
If you sew regularly you will save yourself time and frustration by keeping a basic zipper selection on hand. At minimum stock these:
- Invisible zippers in size #3 in black, white and a neutral beige in lengths of 9, 12 and 22 inches. These cover most dress and skirt closures.
- Coil zippers in size #3 and #5 in black and white in a range of lengths. These handle most general garment needs.
- One or two separating zippers in size #5 for jacket and coat projects.
Buy extras when you find good prices. Zippers do not expire and having the right one on hand means your project does not stop because of a hardware run.
When You Cannot Find the Right Length
Most fabric stores top out at 22 or 24 inches. If you need a longer zipper you have two options. You can buy zipper tape by the yard and add your own stops and slider. Or you can buy a longer zipper and shorten it yourself which is easier than it sounds. A full tutorial on how to shorten a zipper is coming.
Choosing Zippers for Fitted Garments
When you sew fitted garments zipper selection matters more than it does for loose or boxy styles. A fitted dress or tailored trouser puts real stress on the closure point particularly at the waist and hip. The wrong zipper will gap, pucker or pull no matter how well you sew it in.
For center back closures on fitted dresses and skirts the invisible zipper in size #3 is your best choice. For side seam closures on pants and skirts you can use either an invisible zipper or a standard coil zipper depending on your confidence level with each installation method.
For jackets and coats go with a molded plastic or metal zipper in size #5 or larger. The fabric is thick enough to support the weight and the relaxed fit means gaping at the waist is not the concern it is on a fitted dress.
One thing that applies across every fitted garment. Fix the fit before you install the zipper. A zipper will not correct a fitting problem. It will show every one of them.
The Right Zipper Makes the Difference
Zippers are not an afterthought. The right zipper chosen for the right garment and installed with care is what separates a homemade look from a tailored one. Take the time to match the zipper type to the project, the weight to the fabric and the length to the closure. Your finished garment will show that you did.